XtremeGene Transfection Made Simple: A Winning Protocol
When researchers talk about “XtremeGene transfection,” they’re usually referring to a lipid‑based reagent that promises high DNA uptake with minimal toxicity. The appeal is clear: a reliable method can shave weeks off a project and turn a stubborn cell line into a productive workhorse. Below, we unpack the most widely‑cited steps, sprinkle in practical tweaks, and point out common pitfalls so you can walk away with a reproducible protocol.
Why XtremeGene Stands Out
Unlike traditional calcium phosphate methods, XtremeGene forms nano‑sized complexes that fuse readily with the plasma membrane. Research on XtremeGene consistently notes three advantages: (1) broad compatibility across mammalian cell types, (2) lower serum‑dependence, and (3) a relatively gentle cytotoxic profile. These traits make it a go‑to choice for transient expression, CRISPR plasmid delivery, and even small‑RNA work.
Preparing Your Cells – The Foundation
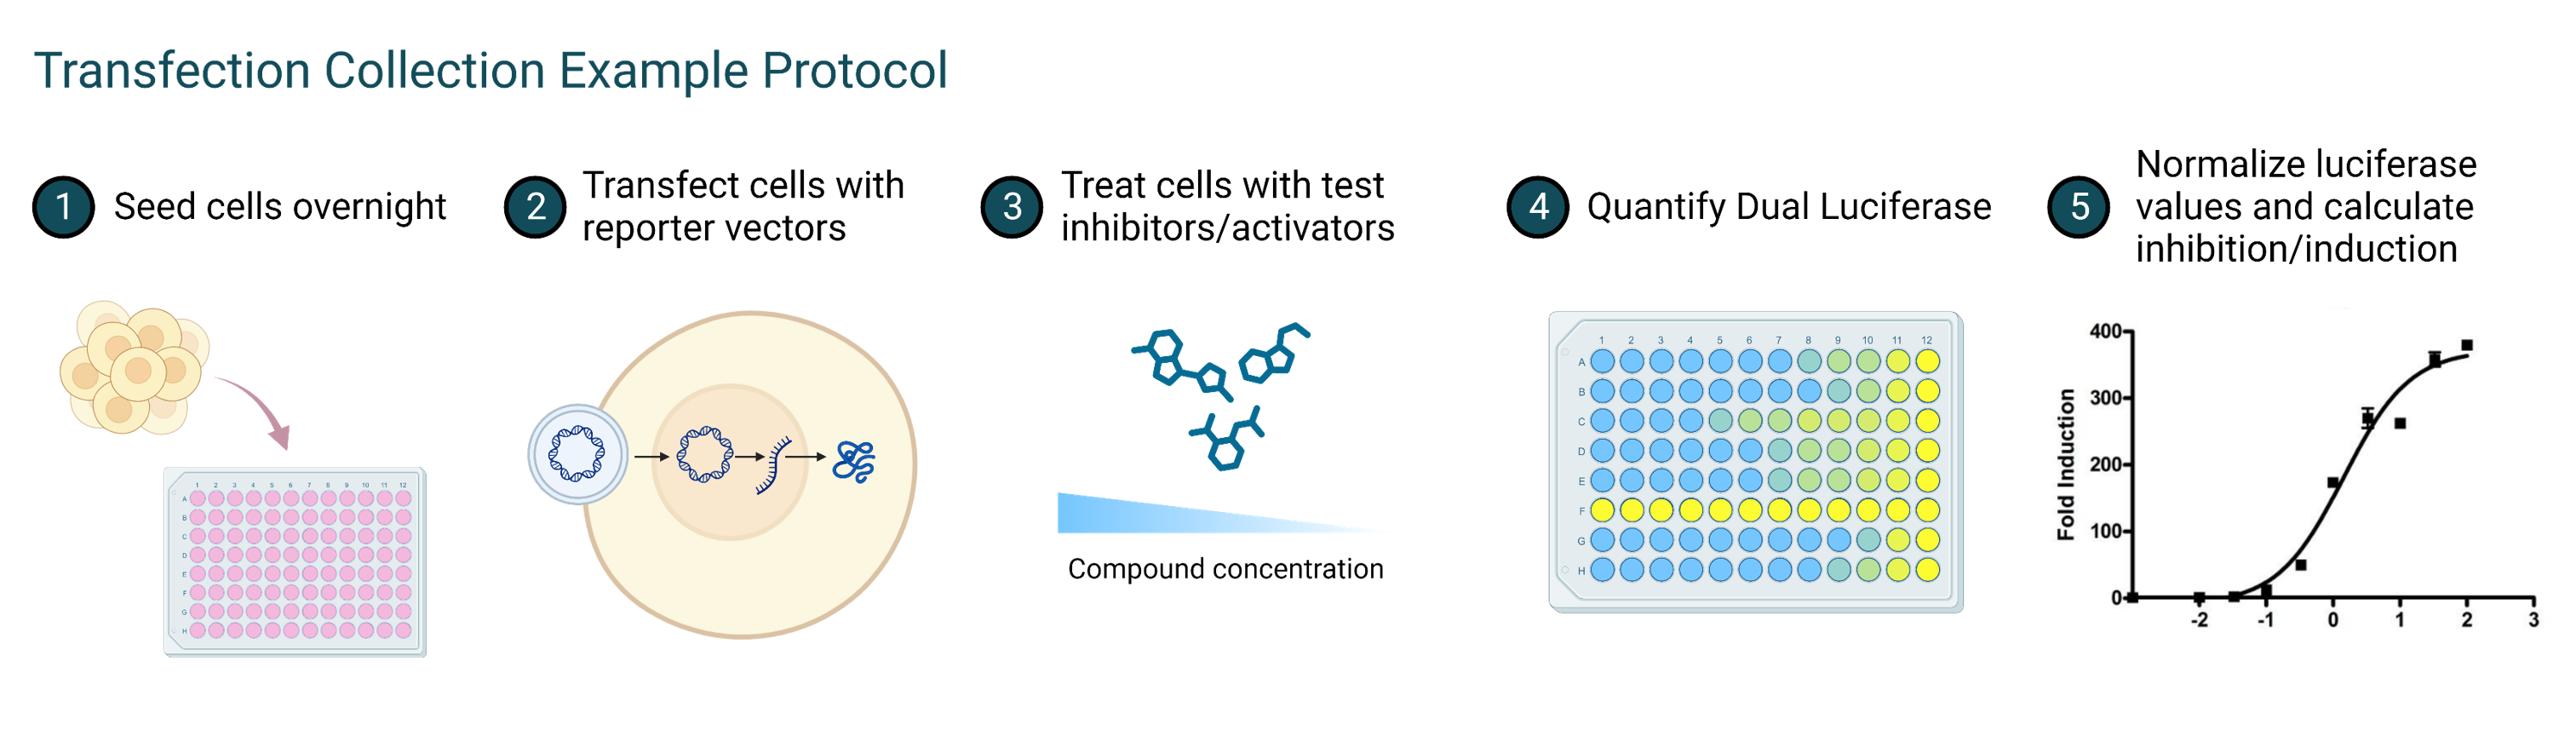
Success starts long before you add the reagent. Aim for a confluency of 60‑80 % on the day of transfection; cells that are too sparse won’t take up enough DNA, while over‑crowded cultures suffer from nutrient depletion and reduced viability. Use a culture medium that matches the cell line’s standard requirements, and consider a brief serum‑starve (2‑4 h) if your target cell line tolerates it—this can boost lipid‑DNA interaction without sacrificing health.
DNA Quality Matters
Supercoiled plasmid DNA yields the best results. If you’ve purified DNA with a column kit, run a quick agarose gel to confirm purity; smears or nicked bands often translate into lower expression. Keep the DNA concentration around 0.5–1 µg per 35 mm dish; scaling up is straightforward—just maintain the same DNA‑to‑reagent ratio.
Mixing XtremeGene with DNA
Follow the manufacturer’s suggested ratio, typically 3 µL of reagent per 1 µg of DNA. Add the reagent to serum‑free medium first, gently swirl, then introduce the DNA solution. After a brief 5‑minute incubation at room temperature, the mixture should appear slightly opalescent—signs that complexes are forming.
Key timing tip
Do not exceed a 30‑minute incubation before applying the mix to cells; extended periods can lead to aggregate formation, which in turn lowers transfection efficiency and raises toxicity.
Applying the Complexes to Cells
Remove the old growth medium, replace it with fresh serum‑free medium, and then add the DNA‑XtremeGene mixture dropwise. Gently rock the dish to ensure even distribution, then return the culture to the incubator (37 °C, 5 % CO₂). Most protocols recommend a 4‑6 hour exposure before swapping back to complete growth medium.
Post‑Transfection Care
After the exposure window, wash the cells once with warm PBS (optional) and replenish with full‑serum medium. This step helps the cells recover from any transient stress caused by the lipid particles. For protein expression studies, assess the readout 24‑48 hours later; for genome editing, allow 48‑72 hours before harvesting genomic DNA.
Troubleshooting Common Issues
- Low expression levels: Check DNA purity, verify the reagent‑to‑DNA ratio, and confirm that the cells were at the optimal confluency.
- High cytotoxicity: Reduce the amount of XtremeGene by 20‑30 % or shorten the exposure time. Adding a small amount of serum (2‑5 %) during the incubation can also buffer the cells.
- Inconsistent results between runs: Use the same passage number and keep incubation times precise. Small variations in temperature or pipetting speed can have outsized effects on lipid complex formation.
Scaling Up: From 6‑Well Plates to Flasks
The same principles apply when you move to larger vessels. Calculate the total DNA amount needed for the surface area, then keep the 3:1 µL‑to‑µg ratio. For 10‑cm dishes, a typical recipe might be 5 µg DNA mixed with 15 µL XtremeGene in 500 µL serum‑free medium. Remember to mix gently; vigorous vortexing can break the delicate complexes.
Safety and Waste Considerations
Although XtremeGene is less hazardous than many viral vectors, treat all reagents as potentially bioactive. Dispose of used medium and lipid‑DNA mixtures in biohazard containers, and wear standard lab PPE—gloves, lab coat, and eye protection.
Putting It All Together
To recap, a successful XtremeGene protocol hinges on three pillars: healthy, appropriately confluent cells; high‑quality supercoiled DNA; and precise timing of reagent‑DNA complex formation. By respecting these fundamentals and tweaking the variables mentioned above, most labs can achieve transfection efficiencies in the 70‑90 % range for easy‑to‑transfect lines, and respectable 30‑50 % for tougher cells.
Frequently Asked Questions
Can XtremeGene be used for RNAi delivery?
Yes. The reagent’s lipid composition accommodates small interfering RNAs (siRNAs) just as well as plasmid DNA. The main adjustment is to halve the nucleic acid amount, because RNA molecules are smaller and require fewer copies for effective knockdown.
Is serum absolutely required during the incubation step?
Not necessarily. Many protocols perform the 4‑hour exposure in serum‑free medium to maximize complex uptake, then re‑add serum afterward. However, some sensitive primary cells benefit from a low‑serum (2‑5 %) environment throughout the incubation.
How does XtremeGene compare to electroporation?
Electroporation can yield higher efficiencies for very hard‑to‑transfect lines, but it often comes with increased cell death and requires specialized equipment. XtremeGene offers a gentler, more scalable alternative, especially when working with large numbers of plates or flasks.
What storage conditions preserve reagent activity?
Store XtremeGene at 4 °C, protected from light. Avoid repeated freeze‑thaw cycles; a single aliquot per experiment helps maintain consistent performance.


:quality(30):format(webp):focal(0.5x0.5:0.5x0.5)/tribunnews/foto/bank/originals/film-kemah-terlarang-kesurupan-massal.jpg)