Nginx, Docker Compose & DigitalOcean: A Simple Guide to Modern Web Deployment
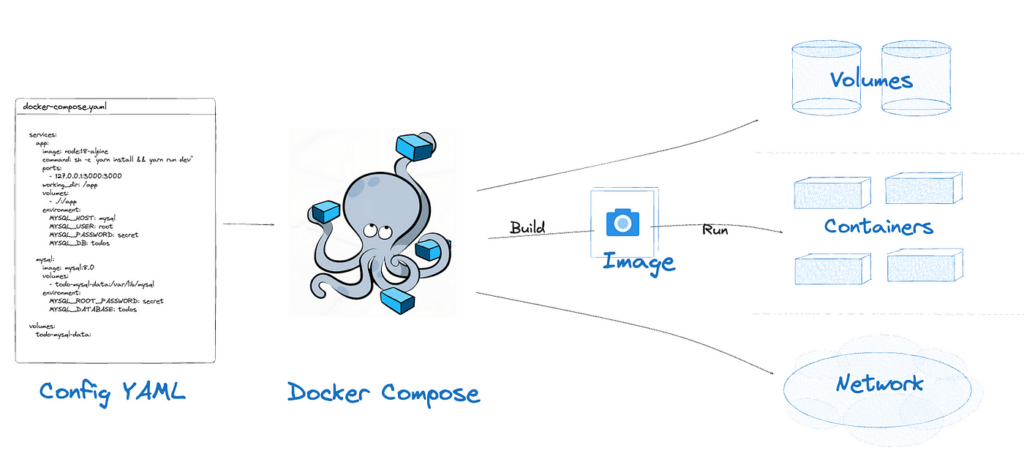
Deploying a web application today means juggling multiple tools. Nginx is a lightweight reverse proxy and web server, Docker Compose lets you orchestrate containers locally or in the cloud, and DigitalOcean provides an affordable, scalable infrastructure. Together they form a powerful stack that is both simple to set up and robust in production. This guide walks through each component, shows how to stitch them together with Docker Compose, and explains how to push the stack onto a DigitalOcean droplet.
Why Combine Nginx, Docker Compose & DigitalOcean?
Each tool solves a common pain point:
- Docker Compose abstracts container configuration into a single YAML file.
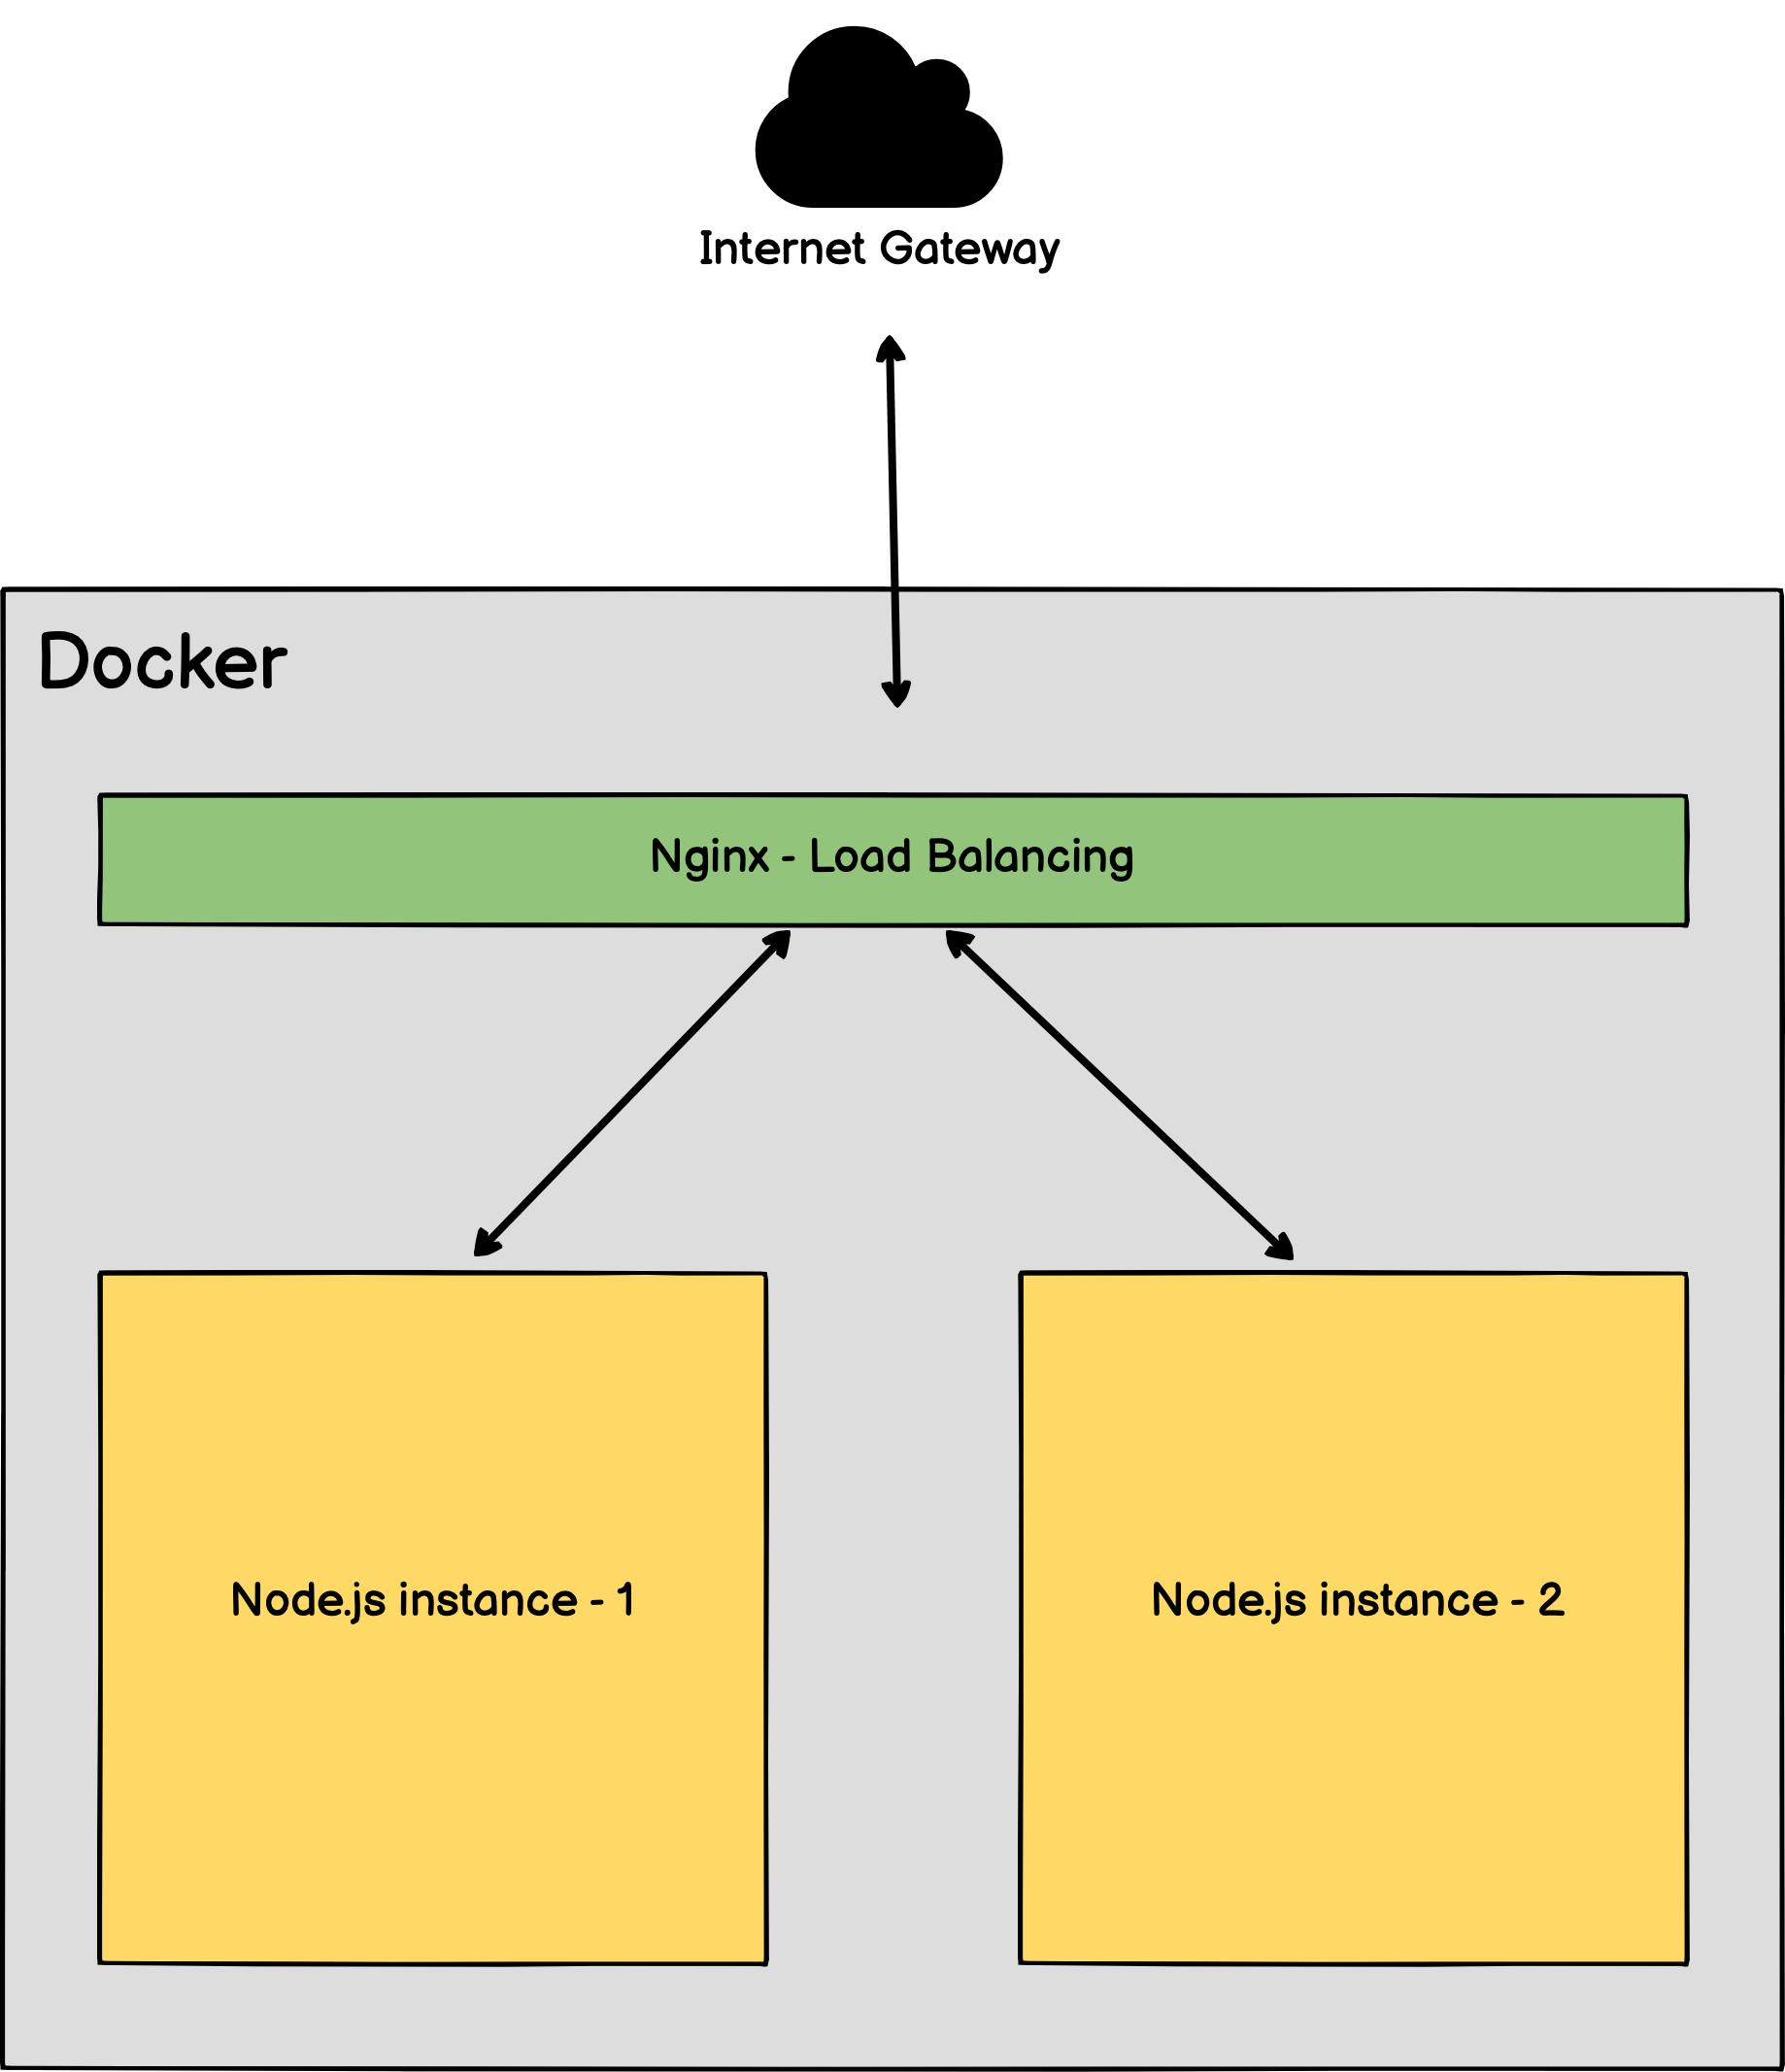
- Nginx handles SSL termination, load balancing, and static file serving with minimal overhead.
- DigitalOcean offers preconfigured droplets, managed databases, and a user‑friendly API that fits well with containerized workloads.
When you stack them, you get a reproducible deployment pipeline: local Compose tests, container images pushed to a registry, and a clean, scalable production environment.
Step‑by‑Step Setup
1. Prepare Your Local Project
Assume you have a Node.js app named app. Create a Dockerfile in the root:
FROM node:18-alpine
WORKDIR /usr/src/app
COPY package*.json ./
RUN npm ci --only=production
COPY . .
EXPOSE 3000
CMD ["node","index.js"]
In the same directory, add a minimal docker-compose.yml that also defines an Nginx service:
version: "3.8"
services:
  web:
    build: .
    ports:
      - "3000:3000"
    environment:
      - NODE_ENV=production
  nginx:
    image: nginx:alpine
    depends_on:
      - web
    volumes:
      - ./nginx.conf:/etc/nginx/conf.d/default.conf:ro
    ports:
      - "80:80"
      - "443:443"
2. Create the Nginx Configuration
In nginx.conf, point requests to the Node container:
server {
  listen 80;
  server_name example.com;
  location / {
    proxy_pass http://web:3000;
    proxy_set_header Host $host;
    proxy_set_header X-Real-IP $remote_addr;
  }
  # Optional: Serve static assets from /public
  location /public {
    root /usr/src/app;
    try_files $uri $uri/ =404;
  }
}
For SSL, you can generate certificates with certbot or use DigitalOcean’s managed certificates. Place them in a certs folder and mount the volumes in Compose.
3. Test Locally
Run:
docker compose up --build
Visit http://localhost. You should see your Node app served through Nginx. Stop the stack with Ctrl+C and docker compose down.
4. Build Container Images
For production, tag the images and push them to a registry:
docker build -t registry.digitalocean.com/yourorg/app:latest .
docker push registry.digitalocean.com/yourorg/app:latest
Do the same for the Nginx image if you plan to customize it. Otherwise, keep using the official nginx:alpine image.
5. Spin Up a DigitalOcean Droplet
Use the doctl CLI or the web console:
- Create a 2‑GB droplet (Ubuntu 24.04). Enable IPv6 if you need it.
- Set up SSH keys for secure access.
- Allocate a floating IP if you want a stable address.
6. Install Docker and Docker Compose on the Droplet
SSH into the droplet and run:
sudo apt update && sudo apt install -y docker.io docker-compose
sudo usermod -aG docker $USER
Log out and back in to apply group changes.
7. Deploy with Docker Compose
On the droplet, clone your repo or copy the docker-compose.yml and related files. Edit the server_name in nginx.conf to match your domain. Then run:
docker compose pull
docker compose up -d
Nginx will now serve your application, handling HTTPS if you added the certificates. Check the logs with docker compose logs -f nginx to verify no errors.
8. Automate Future Updates
- Use Docker Hub webhooks or a CI pipeline (GitHub Actions, GitLab CI) to build and push images on every commit.
- Add a
docker compose.ymlsection that pulls the latest tag. - Set up
docker compose pull && docker compose up -das a script, and usesystemdorsupervisordto restart it on boot.
Common Pitfalls and Fixes
- Port conflicts: Ensure the droplet’s firewall allows ports 80 and 443. On Ubuntu, enable them with
ufw allow 'Nginx Full'. - File ownership: Nginx inside a container might not read files owned by root. Mount volumes with
:roand set proper permissions in the image. - DNS propagation: After pointing your domain to the droplet’s IP, it can take up to 48 hours for changes to propagate fully.
- Scaling: For high traffic, add a second web service instance and let Nginx load‑balance between
web1andweb2using theupstreamdirective.
Optional: Use DigitalOcean Managed Database
If your app relies on a database, consider DigitalOcean’s Managed Database service. Export the connection string as an environment variable and mount it in the web service’s environment section. This keeps your database credentials out of Docker Hub and reduces maintenance overhead.
FAQs
Q: Can I use a single docker-compose.yml for both development and production?
A: Yes, but you should parameterize environment variables and use different docker-compose.override.yml files to adjust settings like logging levels or database URLs.
Q: What if I want to use Docker Swarm instead of Compose on DigitalOcean?
A: Swarm provides built‑in load balancing and scaling